Sunday, June 12, 2011

Multiple Sclerosis Fella.. .

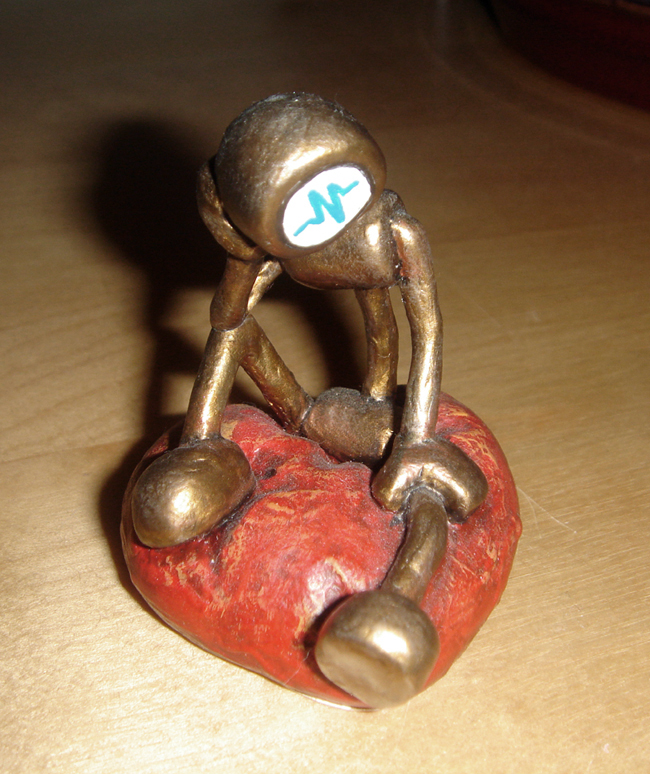
My dad asked me to produce a character that illustrates a condition called 'Drop Foot' for the 'MS Society', a national UK organization that provides help to people suffering with MS.

MS is a disease of the myelin sheaf (the covering of a nerve) and is primarily caused by lesions laid down  by our immune response in the event of a MS attack, which then stops the transition of nerve impulses to corresponding muscles. This means that those impulses cannot move the muscles in for example the leg or foot (being prime candidate of muscles which fail to operate); which in a nut shell is 'Drop Foot' - a condition where the foot is said to feel like a flipper.

This character will be used in the creation of a poster to help iscrease awareness of 'Drop Foot', and will be displayed in hospitals and departments which specifically deal with MS.

Friday, October 01, 2010

Shrunken Head Dog.. .

I was asked to do a small piece of art for auction at the 15 year reunion dinner for the 'Shrunken Head Man' club at San Jose State University. This is the Animation club that everybody there in the animation course is a member of. It helps the students with found raising and is a support network for project collaboration for the students. I had a go at making a Gromit.. .see if the latent Aardman muscle is still firing for the little fella.. .and I think it is.! He feels a little like an older Gromit.. .less cute than the latest films - more my era I guess. :)

I went up to the Lucas 'Big Rock Ranch' to present it to Andrea Rhodes the happy winning bidder on the Gromit and a very talented artist to boot. She was very happy gave me, my Dad and his partner Angela a tour of the grounds.

Then the awesome Mr Don Ta gave us a tour of the "Skywalker Ranch' where George Lucas was taking some tea with someone.. .oooh! And he bought us presents. . .what an amazing star!!!

Tuesday, July 27, 2010

Eco Tubeless Tire Inflator.. .

More and more mountain bike racing can cause the pursuit lower and lower tire pressures and eventually lead to a condition known as "Tubeless - Gimme NOW!" And as such I have been struck down and afflicted. However, I also suffer from "I don't want a 'ruddy great cumbersome/un-portable compressors" syndrome - where upon I consult 'cube mate' Dr. Dave (the oracle of all things tinkering) for an alternative solution; and in his usual unfaltering nature he prescribes at me like my dirty champion. So cast your mind if you will to a universe where, not only can you inflate/fit your tubeless tires with the required high pressure blast that is akin only to a pro-longed Indian diet (I speak from experience); but also with a system that is portable, field rechargeable, and consumes no electricity. That universe is here for you now.. .and it's name!? We call it quite simply 'The Fire Extinguisher.. .'

Here's the basic 1, 2, 3 principle:
  1. Use bicycle pump pressurize a fire extinguisher.
  2. Use fire extinguisher to inflate/fit tire.
  3. Marvel over lovely tubeless tires.. .

I'm not going to go into details, where's the fun in that!? - bloody work it out yourselves, but here's the basic 'what you'll need':
  1. Old fire extinguisher - get, empty, lacquer, inside & out (oil inside to prevent rust).
  2. Pressurizing system - something to hold down release valve and a schrader or presta valve that attaches to main tube of the extinguisher.
  3. Pressurizing system (alt) - a schrader or presta valve fitted in the extinguisher shoulder itself.
  4. Tire inflating system - Pump head that attaches to main tube of extinguisher.
  5. Fittings - tubes, pressure gauge, fittings, gas tape etc.


Here are some of the variables to consider:
  1. Extinguisher size - smaller is more portable, but you get less inflates per charge and visa versa.
  2. Extinguisher handle - a metal system is stronger if you can find one.
  3. Extinguisher type - some have schrader valve fitted to shoulder already (Pressurizing system sorted), but their usually the big canisters.
  4. Fittings - make sure that they all fit, it's why their called fittings so don't abuse their names (keep receipts).
  5. Pressurizing system on main tube - requires more fittings/money, but doesn't breach (weaken) extinguisher wall.


If you're really interested in making one of these for yourself then all you need do is study the pictures below and get at it. I didn't know what I was doing, but a little bit of research and some planning and it was done.. .worked first time.. .BOSH!

If you're unsure about anything, just post a question and I'll try to answer it the best I can. In the mean time, here's a picture of my now fully XC race ready, light as you like, goo framed, camel free, 30psi gravel gripping trail devastator.. .now go and sit in the corner with your hands on your head and think about all of the bad things that you've done.. .

.

Wednesday, December 30, 2009

Spiderman.. .a process study.


I am big fan of the Comic art of Humberto Ramos and Francisco Herrea and especially the way that they draw Spider man. Their work has inspired me to have a go at a funky sculpture of the webbed fella, and the above image is the first stage in its creation. I though that I could use this as a case study to look at how I put these things together, seeing as a few people have been asking my advice at work lately. Righty-tighty - off we go.. .

1. First I wound two pieces of aluminum wire together, and arranging them in shape and proportions of my design I epoxied them at hips and chest to make a strong yet flexible armature that I can adjust as I fine tune the weight of the Piece. I use thick enough wire to be able to hold the pose at the brace of the foot and the ankle. This is where the most weight is being taken so it's the weakest, and if I have a character with a thin ankles, standing on one toe then I'll use Steel and then attach that to aluminum wire at a point of less strain.. the hips of shoulders.

2. I like to 'key' the armature by winding cotton thread around it and then covering it in plastic cement glue. This helps the clay stick to the wire.. .always tricky thing.. .especially with thinner characters. Some people will bulk up some areas of the armature with putty but I find that that makes me less flexible with the design. Unless I have a really clear set of plans I won't do this. I want to be free to adjust the core of the shape as it forms.

3. This armature is pegged into the base using sleeved K&S brass square section - male on the figure and female on the base. This is very important.. it makes the figure solid and controllable. You want to be sure that my figure can support it's own weight when it's hardened. This might sometimes mean adding supports whilst I work on it and taking them off after baking (I did this with Man Holding Bear). But if the thing still can't take it's weight when it comes out of the oven without some horrible support sticking out of it's crotch then your stuck trying to paint the unsightly thing to look like something inconspicuous. Use your imagination.. . :)

4. To start sculpting I covering the whole armature in a thin layer of Super Sculpy. And then I sculpt a foot. I need a foot to start.. .it's where all of the weight goes and if I don't believe in the foot I cant believe in the weight of the model. Perhaps this comes from Stop motion and 'tying' down models with threaded bar, but there has to be one foot before I will continue the model. That foot could change completely.. .and probably will, but I NEED IT to get going. FOOT...!

Tuesday, December 29, 2009

Man Holding a Toy Bear.. .

 In January I had a day of life drawing with Michael Mattesi. He has these theories of Force within the figure that help track energy as it flows through the figure. For me it was a real unlocker for my understanding of the human form and I started sketching the figure all over the place.. .

 . ..This resulted in a small figure sketch that inspired me to enter into a sculpting endeavor - something that I haven't done for a while. It started out as a naive stylized piece and ended up turning into a stylized anatomical study. Being my first anatomical study I borrowed Eliot Goldfinger's 'Human Anatomy for Artists' from Chris Bancroft along with some of his advice and flashed my 'work in progress' in front of the also very talented Bryce McGovern. Thanks lads.. .:)


It's October and I have finally made the time to finish. Fully painted with acrylic and doused in super glue here and there here he is.I opted for the pooed on statue feel in the end which I am pleased about. I was going to go down the flat color with cool tattoos path, but it just didn't suit the style, but it's just not graphic enough style of sculpture. I particularly like how the back turned out so here's   a couple of moody black and whites of that too.. .


Sunday, January 20, 2008

E. Bogan Special.. .

I decided to for fill a boyhood dream - well not so much as a dream really, more of a fancy I guess - of making a remote control car from one of those kits and this is what I made... . It's a Team Losi xxx4 Graphite.

I designed the graphics in 'Photo shop' using a layered PSD with shading, highlighting and masking all built in so that you could easily just drop different designs in and get a good idea of what they would look like. I had to do about 7-10 coats using masking etc to spray the body and added some of the decals that came with the kits as well as some of my own design. I even ended up making decals for the wheels and insides to show where adjusters are etc as well as dooing new lables to match the inside design. I call it the 'E. Bogan' special and it is dedicated to Elaine and her destain for RC Cars.

I went a bit crazy on the power side of things (as is my like) and put in a brushless motor system along with a 11.1V Li-Po battery. I managed to destroy a belt and a drive gear and even melted a 'kevlar slipper spur gear'. But with a bit of re-enforcing and some fine tuning I managed to channel all that power to the wheels in the end. I had to do quite allot of grinding of the body to fit all this in as well and add reinforcing in other areas. I reckon it dose some where between 50 and 60 mph.. .

. ..MONSTER!
Wednesday, October 10, 2007

More Cowboys.. .


Elaine Bogan has gotten me into the drawing of cowboys (that bad girl). Please don't compare mine to hers though.. . er their not comparable styles.. .um .. . I was feeling a bit ill when I drew them.. .a. .ah. .. .my arm is broken. Ok.. .she kicks my a#se! (and she really dose)

Saturday, September 08, 2007

The Rubiks Jerk.. .


Man, It's been a while since I popped something up on me ol' blog. So here is somat that I made about 4 months ago. It's a 'Rubiks Jerk' - a version of the 'Rubiks Cube' made into a present for my lovely lady friend. I re-did the graphics too for the box.. . .on the underside you may be able to make out the my 'belly bum' a bottom likeness achieved by pushing the left and right sides of ones belly together around your belly button.. .live the dream!

Also.. ."I Love The Rubiks Cube!" there.. .I'm out!

Sunday, February 11, 2007

Blind Tommy Stiks.. .

Ear.. .I did this drawing and liked it so I made it into a model.. .I like the model to as it still has allot of the heart of the original drawing. Here are some images form the different stages of development.. .

Saturday, December 23, 2006

Vampire Horse.. .

So Kev says to I that he thought this one was nice enough to pop onto ye ol' blog. I did 3 vampire horse pictures of which this is the first. The 2nd I will post after I colour it as it don't really work just as an ink piece (it needs its volumes filling!). you'll see.. .

Friday, December 08, 2006

Project Gromit

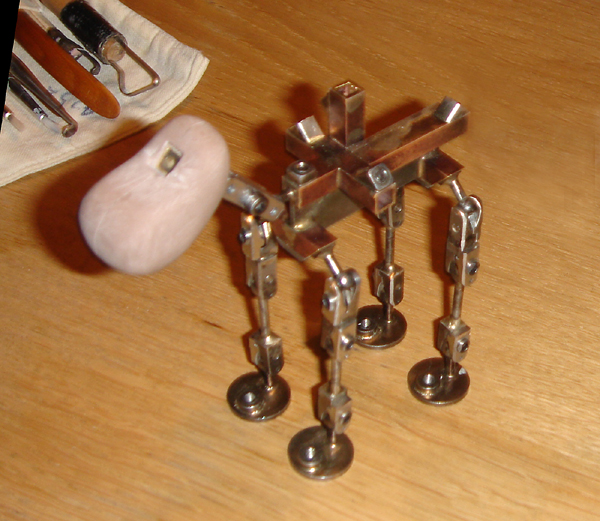
I made a couple of Gromits for me and my friend Kev. Here is the armature care of John Wright Modelmaking in England. He's a star and has done loads of model work the Wallace & Gromit films. I took off the sharp edges to make it as small as possible for the skin and keyed it with cotton (not shown) so that the plasticine would hold better.
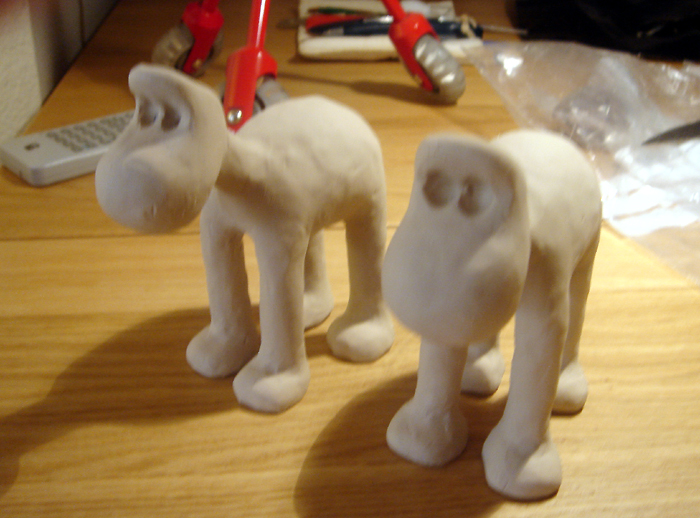
Blocking out the plasticine - they look like something off of 'Village Of The Damned' and give me numerous night mares starring William Shatner aka - The Shat. For some reason 'Village Of The Damned' always reminds me of 'The Devil's Rain'
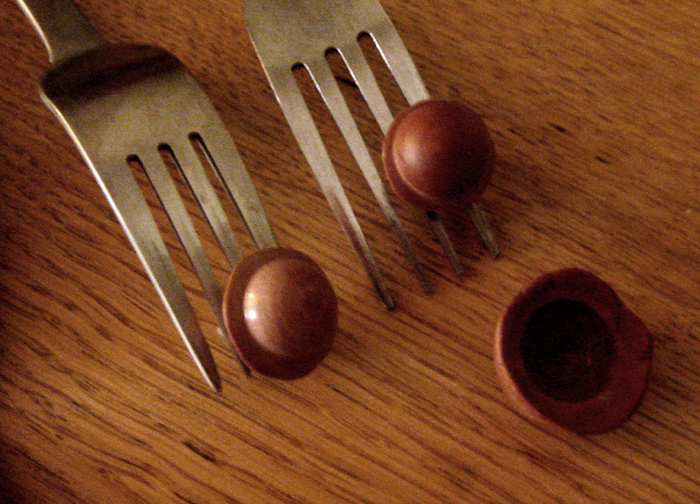
Nose and eyes HAVE to be the right size so that I can get the proportions of the face right. I cast these from a solid Gromit that was a going-away gift from the 'Ware Rabbit' team. See the mould in front of the forks - its a bloomin' fuss when you don't have the right tools. Took me a day to make them noses proper - making mold, molding, undercoting, sanding, spraying, fitting stem.. .bla.. bla.. .bal.. . .
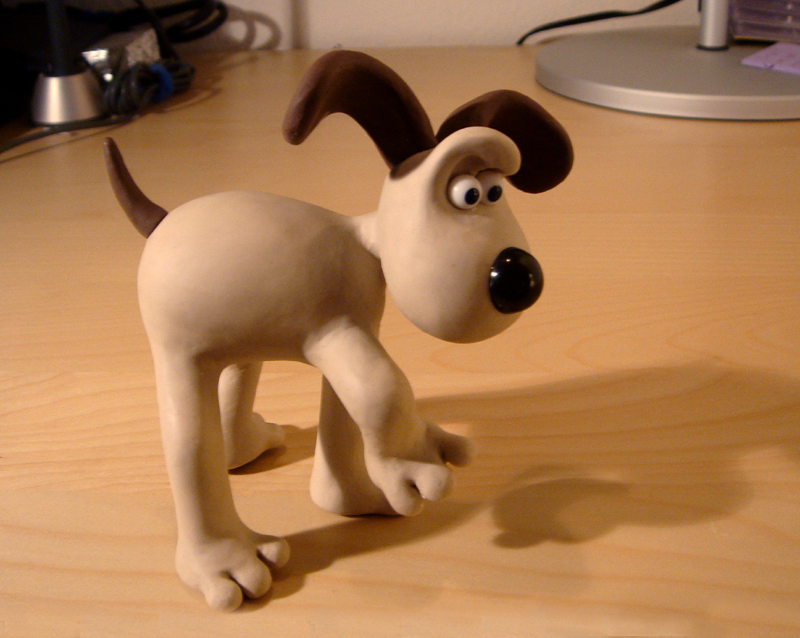
Detail pass - I haven't touched Gromit for a few years and he changes subtly with each film. For example, in the feature film his tail got shorter and his face got a little fatter. My mate Ian Whitlock helped bring me up to date with the face. I also posed the model at this stage and use water to help smooth him down to get the final smooth finish on the surface (useful tip me thinks).

The Final part was altering the plasticine for the ears. I only had a small supply and it was too dry at first, so I mixed it with some Vaseline (petroleum base), but I put too much in and it went like soft cheese, so I had to buy some black board chalk, mash it to dust and mix that in, but I didn't have a pestle and mortar so I spent about a day smashing the plasticine against a wooden chopping board with a hammer!

Thoughtful Robot.. ?

Here's a thoughtfully robot that I made about a year ago for a friend.
He is about 2.5 inches tall. Aluminum wire armature with sculpey on top. Gas mark 6 (130C or 275F) for 15 minutes. Leave to stand for until cool and paint with acrylic until colourful - Serves four.

Thursday, November 23, 2006

Big ME.. .

Here is a bigger version of the 'logo' or that ever it is type thing that is now in the top right hand of my blog. I'm getting an understanding of the way that I colour things more but it is still taking me a while. I squidged around the characters in the end to get the character to stage nicely in a small square format. Cheers.. .

Wednesday, November 15, 2006

Shark

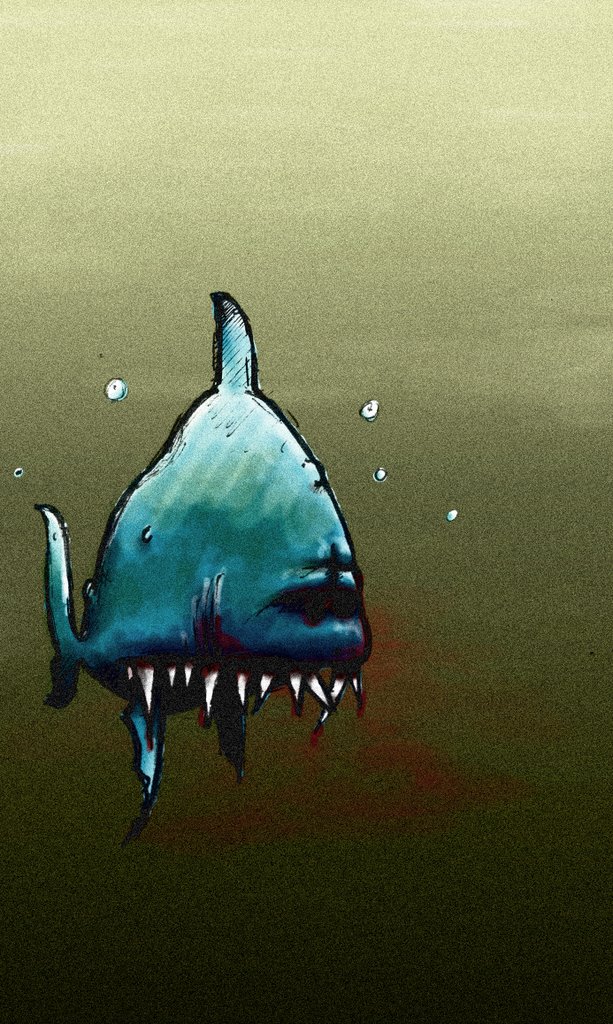
Here is another fishy. I drew it at the same time as I drew 'Glib' but it took me ages to get around to colouring it in. In the end I decided to put a 'film grain' effect on top. A cheap way to finnish it off but I like the way that it mushed some of the colour together - like with the blood i the water. Then I upped the contrast - I don't mind loosing some detail if it gives you a better over all atmosphere.

Sunday, October 22, 2006

Cowboys

Here is a drawing of a cowboy inspired by a recent trip to Calico in California. It's an old Cowboy silver mining ghost town. They put on gun shows, dress up in period costume and there is a train in the middle that takes you around the old mine. You can camp there too.. .much fun!

Glib.. .

It's been a while since I posted something here but here we are with a picture of my fish. His name is 'Glib' and he was a presant (or refugee) from my friend Stephanie - a poet that recently moved to NY to study. I am not very good with BG's and colour, in fact the whole drawing thing is something that I haven't ventured close to in a while but at the moment I am feeling inspired so there are more on the way.

Monday, September 18, 2006

The Black Keys

Went to see 'The Black Keys' the other day at the Avalon in Hollywood with Elaine (her treat - 'You Rock!'). They were amazing! Can't believe how much they filled up the the air with just a guitar and a drum kit so I drew this picture of them bashing out some tunes. Check 'um out if you ever get the chance. If you don't get a chance.. . .Make One!

Thursday, August 03, 2006

sOng.. .

Today in my car I created a song. It's called the 'Yum-Bum' song. Basically you sing the words 'Yum' and 'Bum' to the tune of 'If I wERE A rICH mAN' - That Song frOm 'Fiddler on the RooF'. Occasionally toss in a few words from the origional and here and there change the word 'yum' for 'Yummie' and 'BuM' for "bUmmiE'.. .Try it, it will keep you and your family aMMused for HopuRS on those Ling Trip into the Desart to buRy peOple. .


Tuesday, July 25, 2006

Elaine in PJ's

This is a picture of a Elaine based on another painting of a guy wearing pajamas who has sharp teeth. It was a present. Check out her site if you get the chance, her work is really good - 'Eel Bog' in the links.

Friday, July 21, 2006

Boat Trips..


It is the end of the day and I am home from work. Bloody hard at the moment. We are bringing in a feature film and have a lot of imovable dates to hit so we will be working every Saturday for the next 7 weeks.. .it's gonna be tough.

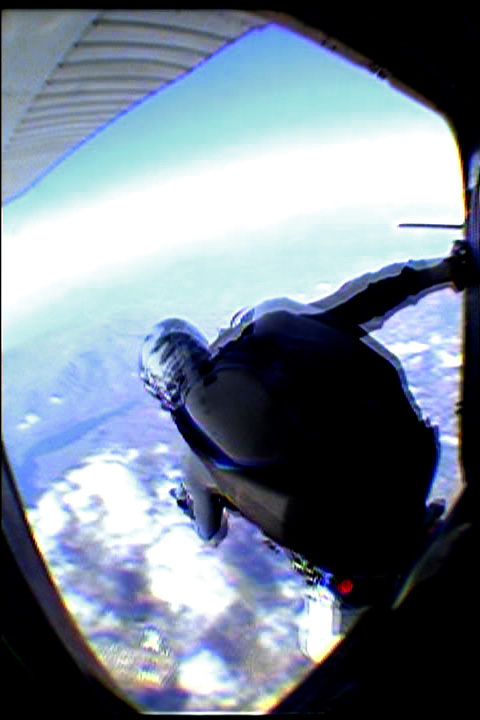
By golly they work hard in the states!! Not much vacation either. It is worth it though cos the film is looking great and when it is done and my eyes are flucked and my brain is dead, I'm taking a few months off for some writing, drawing, traveling, chilling, bike riding, jumping out of aeroplanes, diving off of cliffs.. .

..and a nice big shite!

I is In the Cibero-Spacer-Wacer


Er. Hello nobody. I am Jason. That is my name and here I am in the internet on a site being.. .

Um. Why don't you go and do something usefull with your life you useless lay about. Just sitting there in front of the computer day in, day out eating your cheese and picking you toe nails. I don't .. .yes be like me, I have no nails on either of my big toes and I am happy so live with it or me 'cos stuff.. .


There is lovely lady lying in my bed behind me, yet here I am sitting at the computator Drivel, wheres my. ..of, I just dropped a bit of spit onto my key board. It is detatchable like in the way that a plate is datatchable from the cupbord that you might keep it in but it still works when you take it out. My sister is a plate, I love her.. .

I have a friend who she is smaller than me. I call her 'small friend' and one time I stood on her hand. She cried and I felt bad.


This is my first blog entery. Here it is. yes.